Hello friends, I hope you are very well. Today I share with you the step by step of how to make a 100% keto pizza, the ingredients can be to taste, here the important thing is to learn how to make the pizza dough which is the most difficult part and you have to be patient, I will explain later. Let's get started!


Hola amigos, espero que estén muy bien. El día de hoy les comparto El Paso a paso de cómo realice una pizza 100% keto, los ingredientes pueden ser al gusto, aquí lo importante es aprender a hacer la masa de la pizza que es lo más difícil y hay que tener paciencia, ya les explicaré más adelante. Empecemos!
The first thing I'll leave here are the ingredients, including what I decided to add (although in the end I wanted to add an extra ingredient that I love, you will see)
Ingredients:
For the base: (the dough)
50 Fe of shredded mozzarella cheese
40 gr of almond flour
15 gr flaxseed
1 egg
1 tablespoon cream cheese
1 tablespoon of Parmesan cheese mixed with 3 dashes of olive oil
Salt to taste
Optional: pepper
Lo primero que les dejaré por aquí, serán los ingredientes, incluyendo lo que decidí agregarle (aunque al final le quise agregar un ingrediente extra que me encanta, ya lo verán)
Ingredientes:
Para la base: (la masa)
50 Fe de mozzarella rallada
40 gr de harina de almendra
15 gr de linaza
1 huevo
1 cucharada de queso crema
1 cuchara de queso parmesano mezclado con 3 chorros de aceite de oliva
Sal al gusto
Opcional: pimienta
It is important to mix these ingredients well to have a consistency like this:

Note: I divided this quantity in two parts to have 2 bases to make 2 individual size pizzas. I consider that it is a very good portion and at least I was very satisfied with just one. Prepare both bases and keep one for another day in the fridge.
Es importante que se mezclen bien estos ingredientes para tener una consistencia así:
Nota: Esta cantidad la dividí en dos partes para tener 2 bases para sacar 2 pizzas de tamaño individual. Considero que es una muy buena porción y al menos yo, quede súper satisfecha con una sola. Prepare ambas bases y una la guarde para otro día en la nevera.
You have to be patient to make this dough, it is not difficult but you have to give it a round shape while we take it to low heat so that it cooks little by little. I cook it in 3 or 2 (two points below the middle of hot intensity).

Hay que tener paciencia para hacer esta masa, no es difícil pero hay que irle dando forma redonda mientras llevamos a fuego bajo para que se vaya cocinando poco a poco. Yo la cocino en 3 o 2 (dos puntos más abajo del medio de intensidad caliente).
Luego que estiramos bien, al principio puedes mojarte las manos un poco e irle dando la forma con los dedos pero ya cuando empieza a calentarse mucho el sartén, vas a necesitar seguirle dando forma con una cuchara.

After we stretch it well, at the beginning you can wet your hands a little and shape it with your fingers, but when the pan starts to get very hot, you will need to continue shaping it with a spoon.
The thickness of the base depends on your taste, but I particularly like it very thin, so I stretched it as much as I could. The good thing is that while it is being made as it is cheese, it tends to melt and it will be easier and easier to stretch it. But don't lose patience.

El grosor de la base es depende de tus gustos, pero a mí en particular me gusta bien delgada, así que la estire lo que más pude. Lo bueno es que mientras se va haciendo como es queso, tiende a irse derritiendo y se te hará cada vez más fácil estirarla. Pero no pierdas la paciencia.
I waited about 15 minutes to turn it over and this was the result:

Of course, if it's still missing, don't turn it over, wait for it to dry a little, because ideally with a spatula you can grab the whole base and turn it over without it breaking. Now, if you see that it is burning too much and it does not dry, lower the intensity, because each stove acts differently.
Yo esperé como 15 minutos para darle vuelta y este fue el resultado:
Claro, si es que aún le falta, no le des vuelta, espera que se seque un poco, porque lo ideal es que con una espátula puedas agarrar toda la base y darle la vuelta sin que se rompa. Ahora, si ves que se está quemando mucho y no se seca, bájale a la intensidad, porque cada cocina actúa diferente.
After you turn it over, you are not going to add the ingredients yet!!! You have to wait for both sides to brown so that it gets as dry as possible and doesn't get watery with the tomato sauce, as it would be a total disaster and that's not what we want hehe.

Besides, by leaving it longer, you will get a crispier consistency and I like my pizza with a nice crispy crust (it's a matter of taste) if you like it soft, then don't let it brown so much.
Luego que le das vuelta, no vas a agregar los ingredientes aún!! Tienes que esperar que ambos lados se doren para que quede lo más seca posible y no se ponga aguada con la salsa de tomate, ya que sería un total desastre y no es lo que queremos jeje.
Aparte que al dejarla más tiempo, obtendrás una consistencia más crujiente y a mí me gusta la pizza con la masa bien crujiente (es cuestión de gusto) si te gusta las suave, entonces no la dejes dorar tanto.
Once our base is browned on both sides, we flip it again and start adding the sauce.

For the sauce I used these ingredients:
3 tablespoons of tomato puree
2 dashes of soy sauce
Salt to taste
Pepper (optional)
Oregano
Teniendo ya nuestra base dorada por ambos lados, volteamos nuevamente y empezamos agregando la salsa.
Para la salsa utilicé estos ingrediente:
3 cucharadas de puré de tomate
2 toques de salsa de soya
Sal al gusto
Pimienta (opcional)
Orégano
We mix well the ingredients of our tomato sauce and add it to the pizza base directly without turning it off to continue cooking.

This step is totally to everyone's taste but in my pizza I wanted to add:
Yellow cheese
Leg ham
Serrano ham
Spanish sausage
Tomato and onion
Mezclamos bien los ingredientes de nuestra salsa de tomate y le agregamos a la base de la pizza directamente sin apagar para que se siga cocinando.
Ya este paso es totalmente a gusto de cada quien pero en mi pizza quise agregarle:
Queso amarillo
Jamón de pierna
Jamón serrano
Chorizo español
Tomate y cebolla
Then I covered it for about 10 more minutes, and at this step I turned the heat up a little more and waited. But while I was waiting I decided to add a few squares of cheese (a lot of cheese, I know, haha), that's why I say that everything is to each person's taste.


Luego la tape por unos 10 minutos más, ya en este paso base un poco más la intensidad del calor y espere. Pero mientras esperaba decidí agregarle unos cuadritos de queso de telita (mucho queso, ya lo sé, jaja) por eso digo que todo es a gusto de cada quien.
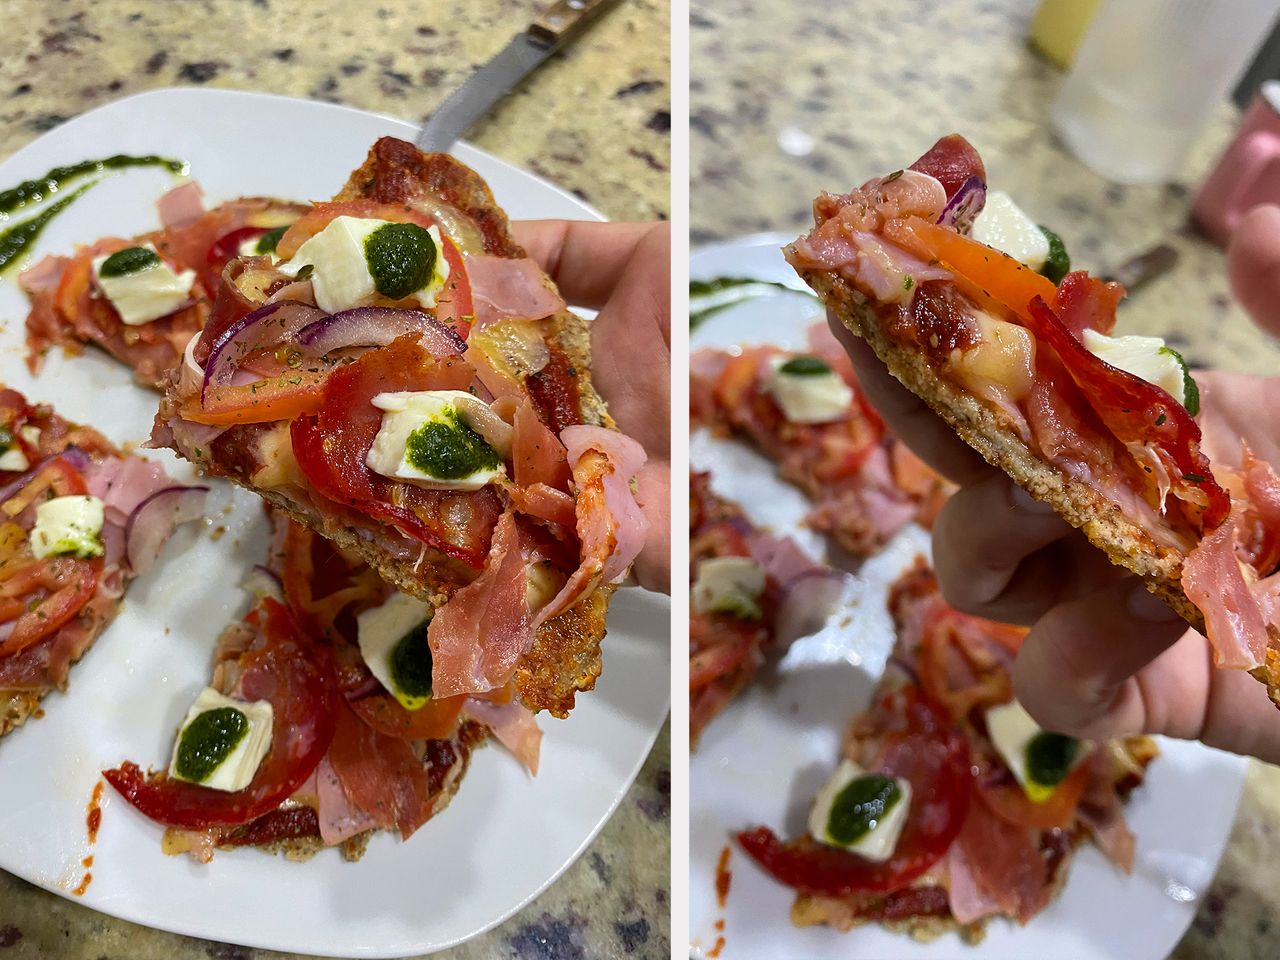
And finally, my final ingredient and surprise after it was ready and I took it to the plate, was a few dots of pesto 😍amo pesto in all your Italian dishes, so you can not miss my beloved pesto.

Here I leave the final result and already cut into 4 pieces and so you can see that the dough is not loose, I also leave another photo grabbing a pizza slide, which by the way was divine and if you do not want to consume a lot of flour, this is a very good option. Later I will make another chicken dough base, for those who don't have almond flour.
Yyyy por último, mi ingrediente final y sorpresa luego de que ya estaba lista y la saqué al plato, fue unos puntos de pesto 😍amo el pesto en todos sus platos italianos, así que no puede faltar mi amado pesto.
Aquí les dejo el resultado final y ya cortada en 4 pedazos y para que vean que no queda con la masa floja, les dejo también otra foto agarrando un slide de pizza, que por cierto quedó divina y si no quieres consumir mucha harina, está es una muy buena opción. Ya luego haré otra masa base de pollo, para los que no tienen harina de almendra.
I hope you liked it and if you have any questions, if you decide to make it at home, ask me.


Best regards,
Vero!
Espero que les haya gustado y cualquier duda que tengan, si deciden realizarla en casa, me preguntan.
Un abrazo,
Vero!
Hi! I'm a Photographer, Designer and Digital Nomad. I consider myself an independent and constantly growing person. My goal of writing in Hive, is to leave a record of much of my life and in turn, continue to get tools that give me the freedom to travel the world while remaining a 100% productive person.