Are you always finding yourself in a situation whereby you take photos with your mobile phone and they don't come out looking professional? And so you opt for downloading images online.
Well, I've got good news for you.
For the next couple of days I'll be taking you all through the process owning images shot and edited with your Mobile phones.
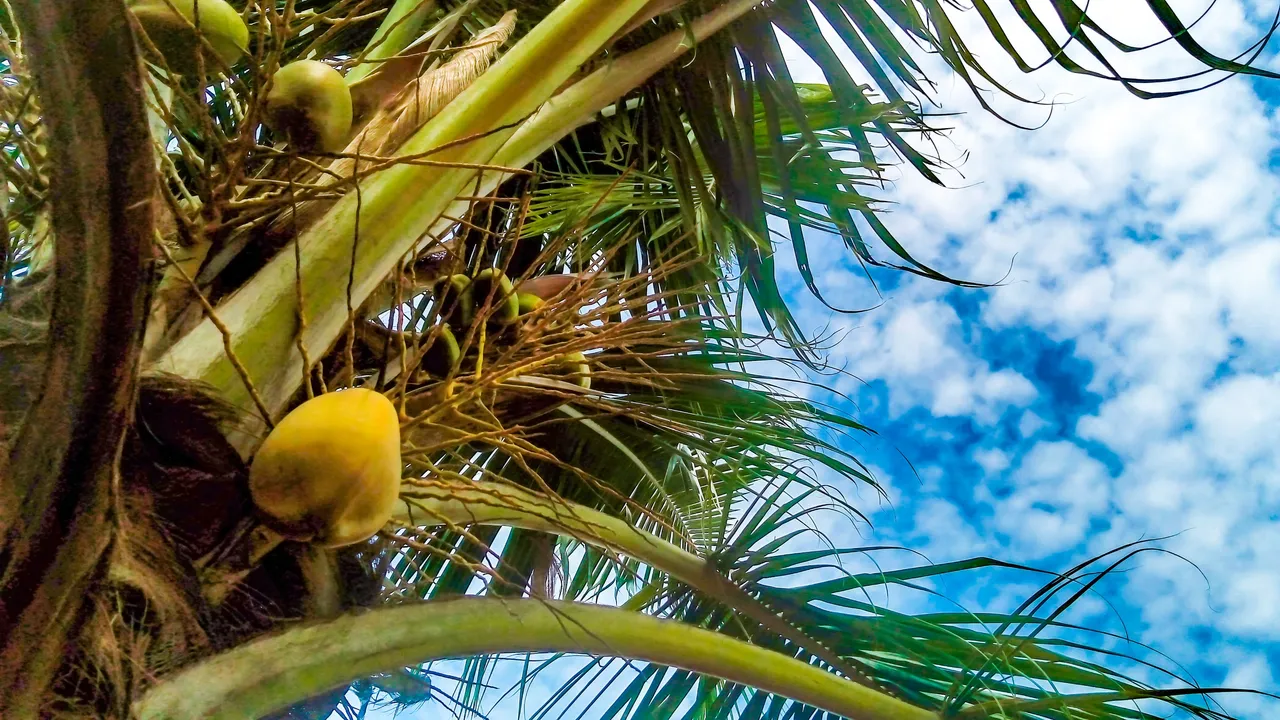
Often times I've had direct messages (DM)on my WhatsApp or Discord channels making enquiries to know if I download the images or if I truly shoot them with my phone like I always say. The answer is Yes and so today, I'm going to be showing the hive community how to do post production (Editing) using your Mobile phones. The choice application I'll be using is Adobe Lightroom CC and the choice image is below.

The image details
Aperture - ƒ1.8,
Shutter speed - 1/1031,
Distance - 3.50mm,
ISO - 114.
Every good picture must posses 3 of the many qualities needed in photography. There are others but you image must have:
- Light
- Depth of field (Sharp)
- Saturation (optional as is the case of Black and White Photography).
Steps
Use the link to download Adobe Lightroom CC for Android Play Store or IOS Apple Store
- Open the Application
- Import the image you want to treat using the + icon as shown by the red marker in the image below.


Adobe Lightroom CC gives you a wide range of ready made presets with varieties of look for your images to ease the stress and save time depending what you need.
but I want to show you the step by step process to build your own custom presets.

LIGHT
- Brightness/Exposure.
The image presently is underexposed which it's darker than normal, brighten it up by sliding the exposure panel to get the right exposure. - Contrast
It draws the attention of the viewer into the image. There are two types of contrast namely:
• Tonal Contrast which is the difference in tones from the lightest part of the image to the darkest. In simple terms it is the difference of White-Grey-Black.
• Color Contrast which simply how each colors of image interact/blend with each other.
In this panel, this is the Tonal contrast. The image contains high contrast already so we'll not be toggling the slide too far.
- Highlights
The brightest part of an image which still holds details. You can see the image still holds details of the clouds, so I'll not be toggling it too far to the left because while exposing the image the sky would become highlighted or too bright and would loose details. - Shadows
Unlike highlights it is the darkest part of an image that still holds details of the image. There are a lot of shadows especially on the tree and so I'll be toggling the slide until I get the desired shadow feel suitable. - Whites
Almost similar to Highlights concentrates more on white and grey surfaces more, making it whiter and less darker. As is the case of the image we have I need the clouds to be whiter so am sliding to the right hand side but just a little so that we don't end up having an over exposed image.
- Blacks
While reducing the shadows and exposing areas hidden in shadows some aspects of the image which are originally black might tend to fade out. This option is to make sure they remain black.


COLOUR ENHANCING
Now its time to work on the colors.
Photographers call this color grading which means how you balance the coloring of the image. You might intend to change the feel and give it a vintage loo or try giving it something cinematic. Maybe settle for enhancing its already colors like I'll be doing today.
Temperature
Measured in Kelvin (K), a high number, means “colder” or whiter the color of the light. The color of light emitted by the sun roughly goes through a red — orange red — yellow — yellow white — white — blue and white gradual process. That is why sometimes some images are reddish and sometimes bluish, depending on the time of the day and weather. You can fix this using the Temperature option.
Vibrance
Vibrance prevents skin tones from becoming overly saturated and unnatural. What the tool does is, it improves dormant colors and leaves the well saturated colors. So I'll usually advice to work more with your vibrance and add less saturation.Saturation
Saturation is uniformly increasing the intensity of all colors in your shot, regardless of the starting point of the colors. The result most times can leave your images over saturated and less natural.

It is advisable to tweak the vibrance of the image by bringing up muted colors before add less saturation.
- Mixing/Blending
Sometimes after increasing the vibrance and maybe adding saturation to your image, some colors becomes too saturated or too bright. Using the mix tool or selective color, you can tone down or increase single colors.
In my image i have blue, green and yellow to tone up and increase its luminance. You should check for the color that is more pronounced or muted to adjust in your image.


DEPTH OF FIELD
By now that the exposure panel has been settled an so also the color panel, the image has become balanced and now usable.
To make your image real and draw the attention of your viewers, the ought to be focus.

- Texture
This is the visual quality of the surface of an image, revealed through variances in shape, tone and color depth.
Sometimes depending on the pixels capacity of your device, your image can come out looking dull and almost blurry and less catchy. This can be fixed by increasing the texture of the image. As is the case of my image, it was pretty sharp and I had to reduce its texture to soften the surfaces and prevent it from being too rough. - Clarity
Clarity picks the mid-tones of an image and enhances them, bringing sharpness to an image and increasing the texture found there. Take care while using clarity because while it increase texture and sharpness it also darkens you image. - Dehaze
Presently we're in the rainy season and outdoor photos don't come out looking flattery this is because the image is covered in haze or fogs as in the case for dews during the harmattan or snowy seasons. Dehaze helps to clear out the fog leaving you with a well defined image.
FOCUS
An image that is in focus is crispy and clear, while one that is out of focus will appear blurry. Before taking the image shot there are steps to use to aid your device achieve focus but now we are in post production so how do you add focus to you image.
- Sharpness
This how clearly detail is rendered in an image. A sharp image looks cleared in focus and contrast. - Radius
The radius value is just like adjusting the brush size of the filter that will paint along the edges. Let's assume you set the radius to 2, it means Sharpening may occur two pixels deep on each side of the edge. - Detail
This means how much of the original image is increased or reduced. - Masking
It helps to cover up or reveal parts of an image during processing. The revealed part of the image is affected by every step of changes you make while the hidden parts remains unchanged. - Noise Reduction
The noise reduction process smoothens pixels, and it can also remove fine detail. The goal is not to remove noise completely (as could have been achieved during the shoot). Instead, the focus is to reduce noise so that it is not distracting.
Note: In digital photography, “noise” is the term used to describe visual distortion. Similar to grain found in film photographs, but can also look like splotches of discoloration when it's really bad, and can ruin a photograph. Noise tends to get worse when you're shooting in low light and want to open it up by adding light in post production.

And so this is what our image looks like
Before


I hope with this, we all can confidently shoot our images and edit them thereby owning everything from content writing to images.
All images were shot with my smartphone TECNO POUVIOR 3 and edited with Adobe lightroom CC for mobile.
Don't be a stranger, I would like to hear from you. Please drop your feedbacks in the comments section. Hit the Follow button for current posts.
Read also
MIXED FEELINGS
SCULPTURE: HOW TO MAKE A FEMALE BUST (With pictures)
SCULPTURE: TRICKS AND STEPS
THE VOID
HOUSE FLY
ACCOUNTABILITY: NIGERIAN DREAM
© 2020
INTELLECTUAL RIGHTS RESERVED
WHATSAPP
FACEBOOK, TWITTER,
This post was published on Hive.io blockchain.